Composting is one of the simplest and most effective ways to reduce waste, improve soil health, and make your garden thrive. By turning your kitchen scraps and yard waste into rich, organic compost, you can create a natural fertilizer that nourishes your plants and reduces the need for chemical fertilizers. Starting a compost bin at home is easy, and this guide will help you set up a successful composting system that fits your needs and space.
Why Compost?
Composting offers numerous benefits for both the environment and your garden. By composting, you reduce the amount of waste that ends up in landfills, where it can contribute to greenhouse gas emissions. Instead, organic waste is transformed into a valuable resource that improves soil structure, increases moisture retention, and provides essential nutrients to plants.
Compost also helps improve the health of your garden by supporting beneficial microorganisms and earthworms, which play a crucial role in maintaining healthy soil. Using compost in your garden can lead to healthier plants, increased yields, and a more resilient ecosystem.
Choosing the Right Compost Bin
The first step in starting a compost bin at home is choosing the right type of bin for your space. There are several options to consider, depending on your needs and the size of your garden. Here are some common types of compost bins:
- Traditional Compost Bin: A traditional compost bin is a simple container that holds organic materials as they decompose. These bins can be made from wood, plastic, or metal and are suitable for outdoor spaces like backyards. They are easy to use and can handle a large volume of compostable materials.
- Tumbler Compost Bin: A tumbler compost bin is an enclosed container that can be rotated to mix the compost. Tumblers are ideal for smaller spaces and make it easy to aerate the compost without using a pitchfork or shovel. They are also faster at producing compost, typically taking only a few weeks to a couple of months.
- Worm Compost Bin (Vermicomposting): Worm composting, or vermicomposting, uses red worms to break down organic materials. Worm bins are great for small spaces, such as apartments or balconies, and are perfect for composting kitchen scraps. Vermicomposting produces nutrient-rich worm castings, which are highly beneficial for plants.
- DIY Compost Pile: If you have a large backyard, you can create a compost pile without a bin. Simply designate an area for your compost and start piling up your organic materials. This method is low-cost but requires more effort to manage, as you will need to turn the pile regularly to keep it aerated.
Selecting a Location for Your Compost Bin
Once you have chosen the type of compost bin, the next step is to select a suitable location. Ideally, your compost bin should be placed in a well-drained area with good air circulation. It should be easily accessible so that you can add materials and turn the compost regularly.
If possible, place the bin in a partially shaded area to prevent it from drying out too quickly in the sun. However, some sunlight is beneficial, as it helps speed up the decomposition process. Make sure the bin is placed on bare soil, as this allows beneficial organisms like earthworms to access the compost and aid in the decomposition process.
What to Compost
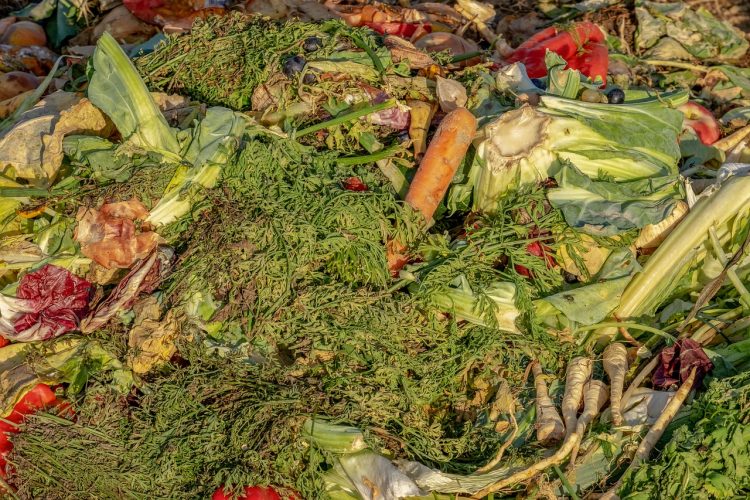
Successful composting starts with knowing what materials can and cannot be composted. A balanced compost pile requires a mix of “green” materials, which are rich in nitrogen, and “brown” materials, which are rich in carbon.
- Green Materials: These include kitchen scraps like fruit and vegetable peelings, coffee grounds, tea bags, and grass clippings. Green materials provide nitrogen, which helps fuel the composting process.
- Brown Materials: These include items like dry leaves, straw, cardboard, and small branches. Brown materials provide carbon, which helps create the structure needed for proper aeration.
To create a healthy compost pile, aim for a ratio of about three parts brown materials to one part green materials. This balance ensures that the compost breaks down efficiently and prevents unpleasant odors.
What Not to Compost
Certain materials should not be added to your compost bin, as they can attract pests or cause problems during the composting process. Avoid composting the following:
- Meat, fish, and dairy products
- Grease, oils, and fatty foods
- Pet waste (from cats or dogs)
- Diseased plants
- Weeds that have gone to seed
These materials can attract rodents and other pests, introduce harmful pathogens, or create foul odors in your compost pile.
Building Your Compost Pile
To start your compost bin, begin by adding a layer of coarse brown materials, such as small branches or straw. This helps create a base that allows air to flow through the compost pile. Next, add a layer of green materials, followed by a layer of brown materials. Continue layering green and brown materials as you generate compostable waste.
As you build your compost pile, try to chop or shred larger items into smaller pieces. This increases the surface area and helps speed up the decomposition process. Keep adding new materials as they become available, and remember to maintain the balance of green and brown materials.
Maintaining Your Compost Bin
To create high-quality compost, it’s important to maintain your compost bin properly. Here are some key tips for maintaining your compost bin:
- Turn the Compost Regularly: Aerating your compost pile by turning it regularly helps introduce oxygen, which is essential for the decomposition process. Use a pitchfork or shovel to mix the materials every one to two weeks. If you’re using a tumbler compost bin, simply rotate the bin to mix the compost.
- Keep It Moist: Compost should be kept as moist as a wrung-out sponge. If your compost pile is too dry, it will decompose slowly. If it’s too wet, it can become compacted and start to smell. Add water if the pile feels dry, and add more brown materials if it feels too wet.
- Monitor the Temperature: A well-maintained compost pile will heat up as microorganisms break down the organic materials. The ideal temperature for composting is between 135-160°F (57-71°C). If your compost pile isn’t heating up, it may need more green materials or moisture. Conversely, if it’s too hot, turn the pile to cool it down.
- Be Patient: Composting takes time, and the amount of time required will depend on various factors, including the type of materials, the size of the pieces, and how often the pile is turned. Typically, compost is ready to use within three to six months, but it may take longer depending on the conditions.
Using Your Finished Compost
Once your compost is dark, crumbly, and has an earthy smell, it’s ready to use in your garden. Finished compost can be used in a variety of ways to improve your garden’s health:
- Soil Amendment: Mix compost into garden beds to improve soil structure, increase fertility, and boost microbial activity. This will help your plants grow stronger and more productive.
- Mulch: Spread a layer of compost around your plants to help retain moisture, suppress weeds, and add nutrients to the soil as it breaks down.
- Potting Mix: Mix compost with other ingredients, such as peat moss and perlite, to create a nutrient-rich potting mix for container plants.
Starting a compost bin at home is an easy and rewarding way to reduce waste, improve your garden, and contribute to a healthier environment. With just a little effort and regular maintenance, you can create nutrient-rich compost that will benefit your garden and help you grow healthier, more vibrant plants.


